ImBatch helps users apply new -- and edit prexisting EXIF/IPTC metadata on their image files. Whenever we take a picture using a digital camera, the resulting image file is encoded with all sorts of data. This information keeps track of everything from the date/time the picture was taken, to whether or not a flash was used. Sometimes though, it becomes necessary to remove some (or all) of a file’s EXIF/IPTC info. That’s one of the areas where ImBatch can help! Here’s how:

How to Remove EXIF/IPTC Tags (in batch)
Step-by-step
- To begin, launch ImBatch.
-
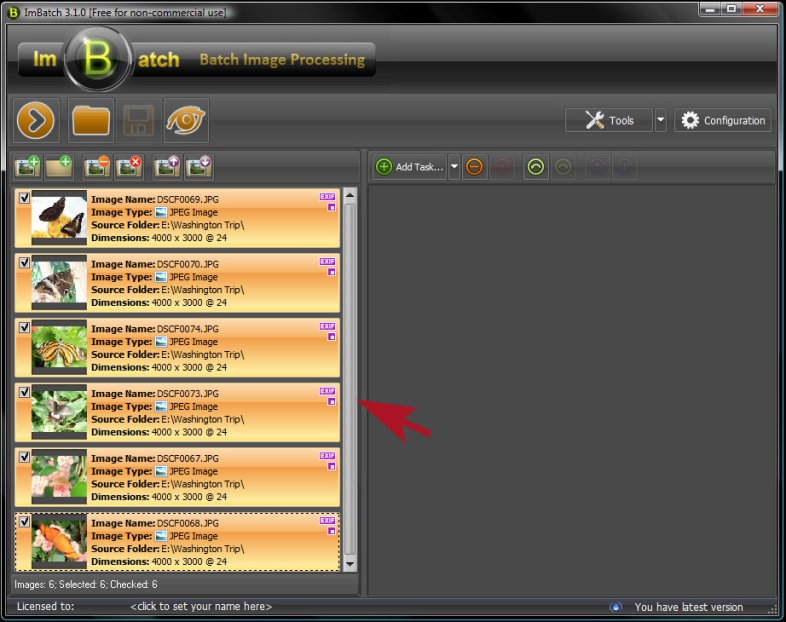
Next, load the images that you plan to work with. You can do this by clicking the
 Add new images for processing button or by dragging and dropping images into the work space located on the left side of your ImBatch window.
 - Once all images are loaded into the work space, highlight every image to indicate that the tags you plan on removing should be deleted from all images. With the topmost image highlighted, hold down you shift button. Next with shift still held down, hover your mouse cursor over the bottom most image and left-click. This will highlight every image between the first and last.
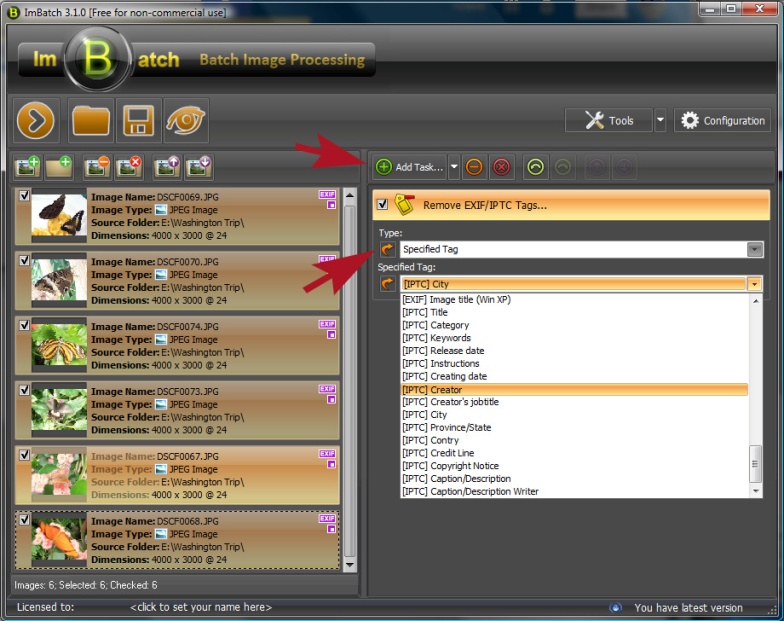
- In order to remove EXIF/IPTC tags, click on
 Add Task and then select
  Remove EXIF/IPTC Tags from the dropdown menu. This will add a task to Remove EXIF/IPTC Tags.
 - Next you need to tell ImBatch what Type of removal you’ll be performing. Does it pertain to all images? EXIF only? IPTC only? Or a specified tag?
- If you choose to remove Specified Tags, a secondary menu becomes available that lists all of the EXIF and IPTC tags individually for you to choose from.
- Repeat steps (5) and (6) as often as needed by creating additional tasks. Each additional task will represent another item (or category of items) that will be removed from your images.
- When you’re ready, decide whether you want to alter the original images, or create copies of those images that reflect your changes. To create copies, return to the Add Task button and click on Save >
 Save As. Here you will find an assortment of customization options and image formats allowing you to save your projects exactly as you see fit.
 -
After you’re finished click the
![[>]](/images/imbatch/button_run.png) Run batch image processing icon located in the top left toolbar.
Run batch image processing icon located in the top left toolbar.