For quick and convenient batch editing, check out our Context Menu Editor. One of our newest options, this powerful feature lets you add previously saved task combinations directly to Explorer’s native context menus. Now when you right-click any image file, your Explorer context menu will include an ImBatch menu item. By hovering your cursor over the ImBatch icon, a list of saved task builds will be revealed. This allows users to reference and reuse any instructions that they’ve elected to save from previous projects. In order to begin using this feature though, you’ll need to save your task builds as batch files (.bsv) that ImBatch can reference. Here’s how:

How-to Create Batch Files For use with the Explorer Context Editor
Step-by-step instructions
- Start by launching ImBatch.
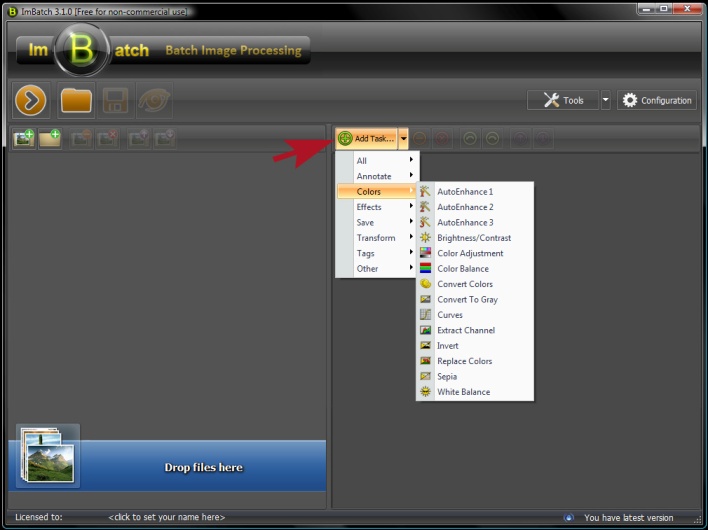
- Next, begin designing task builds by clicking the
 Add Task button. Here you will find a variety of tasks that help you modify the look, feel, and functionality of your images.
*Note: this can be done with or without images loaded into the work space area. Whether you have project settings that you’d like to save for reuse later, or you have ideas for future projects; both methods are possible with ImBatch.
- Repeat step (2) by clicking the Add Task button as many times as necessary until you’ve added every change that your project requires.
- However many tasks your project includes, you will want to add one final task to your build:
 Save As. Click Add Task and select Save followed by Save As. Here you can further define your project output details so that ImBatch knows to not alter your original images. Instead, it will generate new copies of those images and leave the originals intact.
 - When you are finished adding tasks to your project, click the
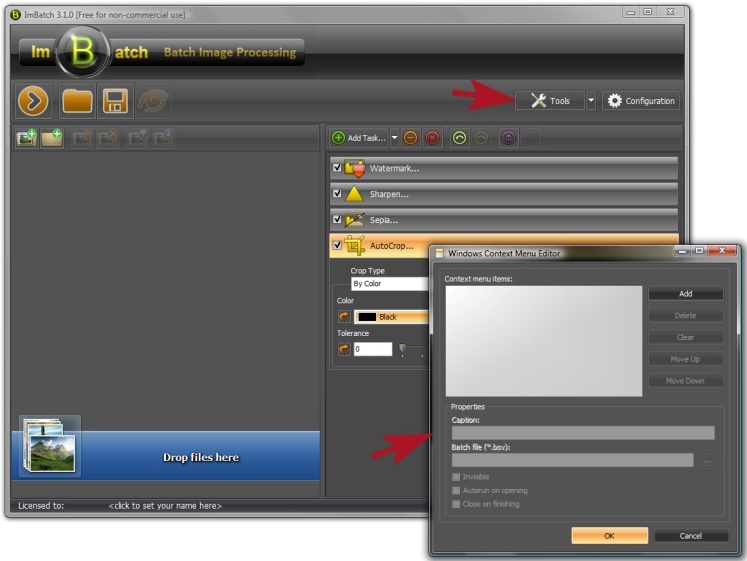
 Tools button and select
  Context Menu Editor. This will open the Windows Context Menu Editor interface.
- Next, click the Add button to create a new context menu item. Type the name of your project build into the Caption text field. For this example we’ll name our new project build “Signature Look”.
-
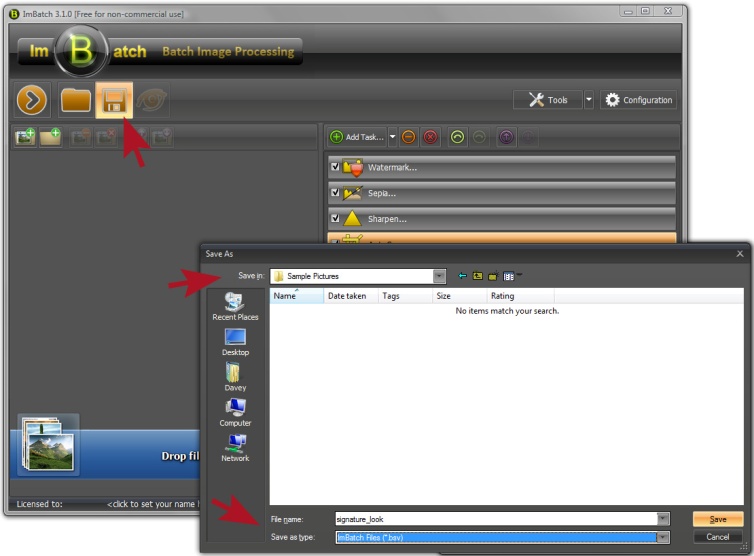
After you have named your new context menu item, you will also need to tell ImBatch where to save it, and by what name. Continue by clicking the
 Save tasks to the file icon in the top-left toolbar of main ImBatch interface window. This will open the Save As window. Here you need to choose where you want to save your new context menu item, give it a file name, and choose what type of file to save it as.
*Note: the Save as type field should already read ImBatch Files (*.bsv). Leave this as is. - When ready, click the Save button to continue.
- Now return to the Windows Context Menu Editor and click the […] button to the right of the Batch file (*.bsv) text field. This will activate the Open batch files window. Here you can point ImBatch to the location of the batch file you just created in step (6).
- Click on the file icon to have it auto-fill the File name text field. Click the Open button when you are ready.
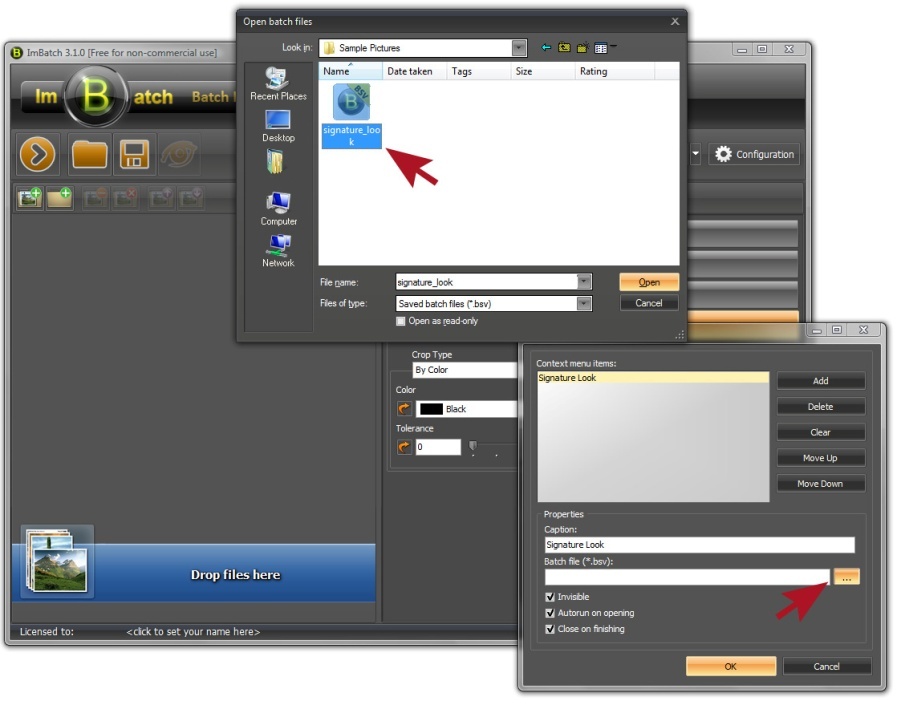
- This will close the Open batch files window, and auto-fill the Batch file (*.bsv) text field in the Windows Context Menu Editor with the exact location of the batch (.bsv) file that you are creating. When ready, click the OK button.
- You are now ready to test your new context menu item. Locate an image on your hard drive and right-click to open the windows context menu. You should see an ImBatch icon in the menu. Right-click the icon to reveal a list of task builds that you have created.
