Using ImBatch (manual)
The ImBatch main window consists of three parts:
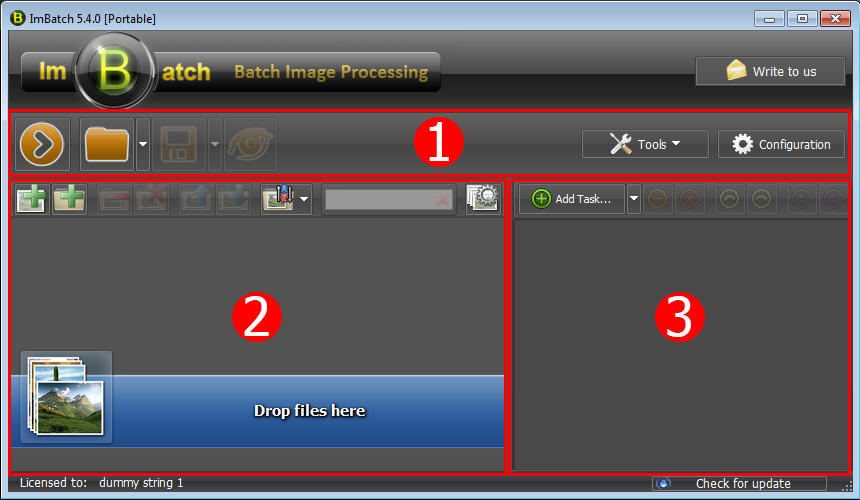
- Main toolbar
- Image list
- Task list
Image processing
Image processing in ImBatch is done in three steps:
1. Add images
You can add images in two ways:
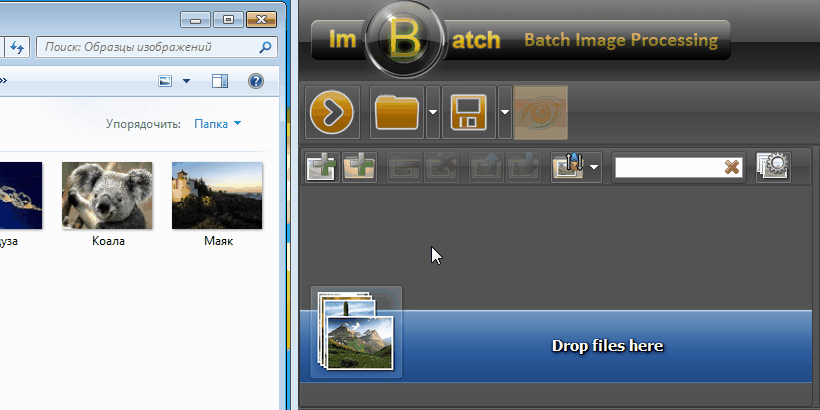
- Drag and drop images or a folder with images onto the ImBatch main window from any file manager (for example, from Windows Explorer):
- Use the Add Image dialog box by clicking the
 button, or use the Add Folder dialog box by clicking the
  button.
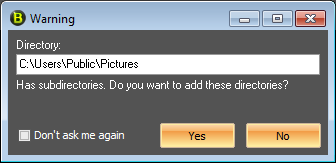
Note: If the folder that you are trying to add contains any subfolders, ImBatch will ask you if you want to scan all subfolders.
2. Add and configure tasks
Now you can add image processing tasks. Tasks are a key feature of ImBatch. Use them to configure image processing. It is very important that you put tasks in the correct order. You can move tasks up or down in the task list. You can disable any task by unchecking the checkbox at the left of that task ( ). Each image is first processed by the first (topmost) active task. Then the image is passed for processing to the next active task, and so on, until it has been processed by all active tasks.
Click the button 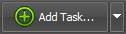 to add a task. The Add Task dialog box will appear:
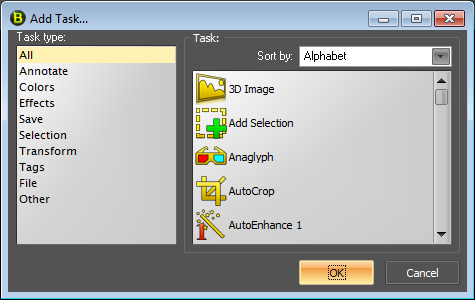
In the left part of that dialog box, you can see the task type list. If you select a task type, all tasks of that type will appear in the task list (see the right part of the dialog box). If you select "All" in the task type list, all tasks will be displayed in the task list. You can sort the task list alphabetically or by relevance. If you select the relevance sort order, the tasks will be sorted by selection frequency. That is, the tasks that you selected more frequently in the past will be placed higher in the list.
Select the task that you need in the list on the right and click the ОК button. The selected task will be added to the task list (see the right part of the ImBatch main window).
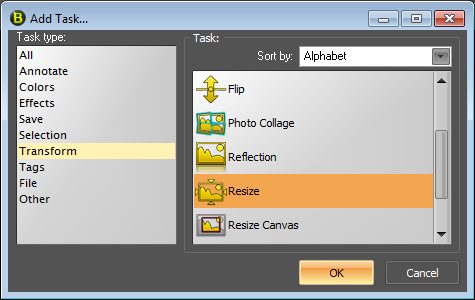
It’s easy to configure ImBatch tasks. For example, let’s create a list of tasks to resize images in such a manner that their width becomes 1024 pixels and their height is changed proportionally to preserve the aspect ratio, and then convert them to PNG.
First, add a "Resize" task. To do it, click the "Add Task" button and select "Transformation" in the task type list (on the left in the Add Task dialog box). Then select the "Resize"  task in the task list (on the right in the dialog box) and click ОК.
The task list will look like this:
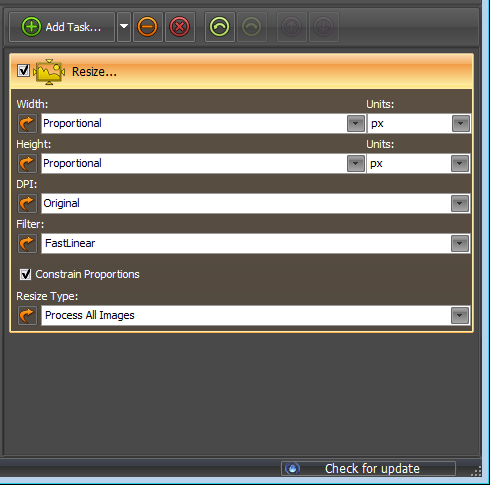
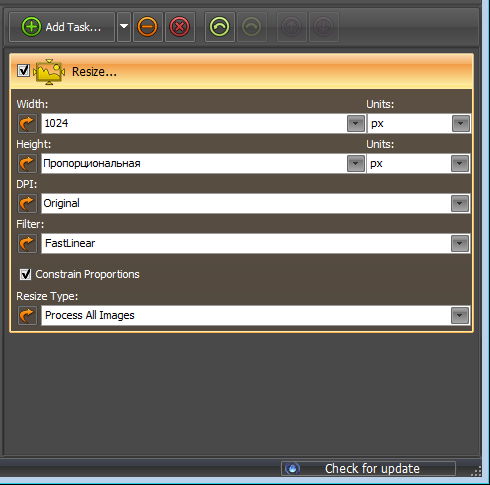
Now configure the task. Enter "1024" in the Width input field (to replace Proportional). That’s all. The task list will look like this:
Now add the "Save as" task.
Note: The "Save as" task is very important. It allows you not only to save images under a different filename, but also to convert them to a different format, and to set image saving options. It is very important that you place this task in the list correctly. Make sure that this task (or any other task of the Save type) is the last (bottommost) active task in the task list. If the last task in the task list is not of the Save type, each image processed will be saved to the original file, overwriting the original image. If you’ve made that mistake, ImBatch will inform you about that before starting to process the images. If you have forgotten to add the "Save As" task, you can stop image processing.
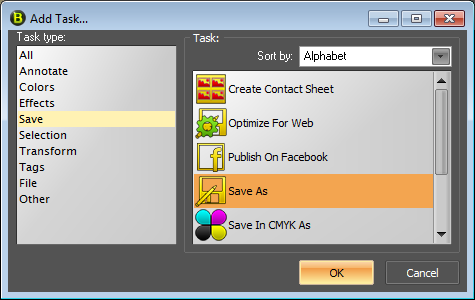
Click the "Add Task" button and select "Save" in the task type list (in the left part of the Add Task dialog box). Then select "Save As"  in the task list (in the right part of the dialog box) and click OK.
The task list will look like this:
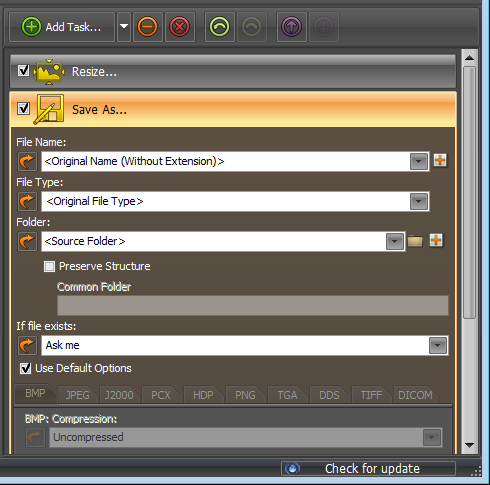
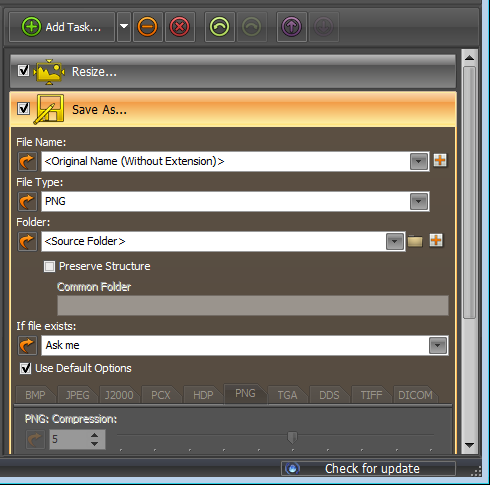
As you can see, there are lots of settings here. Luckily, in case of image conversion to PNG you only need to change the "File type" parameter to PNG. The modified "Save as" task will look like this:
That’s all, you have added and configured the tasks!
3. Start processing
After adding images, and adding and configuring tasks, you can start processing the images. Just click the Start Processing  button on the left in the main toolbar.
Check more HOW-TO articles about batch image processing with ImBatch