ImBatch allows users to rename image files in bulk through the use of templates. A feature that can be found under the Other grouping under Add Task, Rename is a powerful and convenient option when you need to save time. You can specify any existing meta tag value that youŌĆÖd like ImBatch to reference, and this value will automatically be added to your new image files when you save them. To learn more about how to add a rename task, read on.

Renaming a batch of photos to a specific naming convention
Step-by-step instructions
- First, youŌĆÖll need to start up ImBatch.
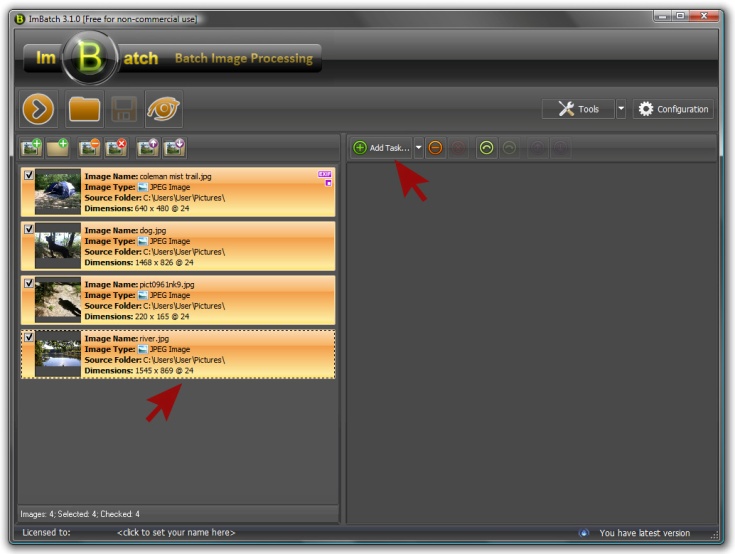
- Next, load the images that you plan to work with. You can do this by clicking the Add new images for processing button or by dragging and dropping images into the work space located on the left side of your ImBatch window.
- Once all images are loaded into the work space, highlight the image(s) you plan to rename by referring to the image metadata.
- With your image(s) highlighted, click the
 ┬ĀAdd Task button.
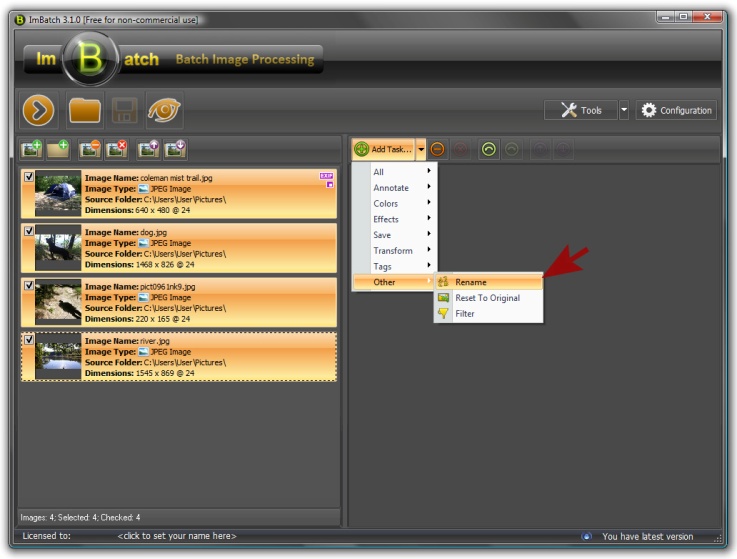
- Scroll down to the bottom of the list and click Other. From here, you want to select Rename.
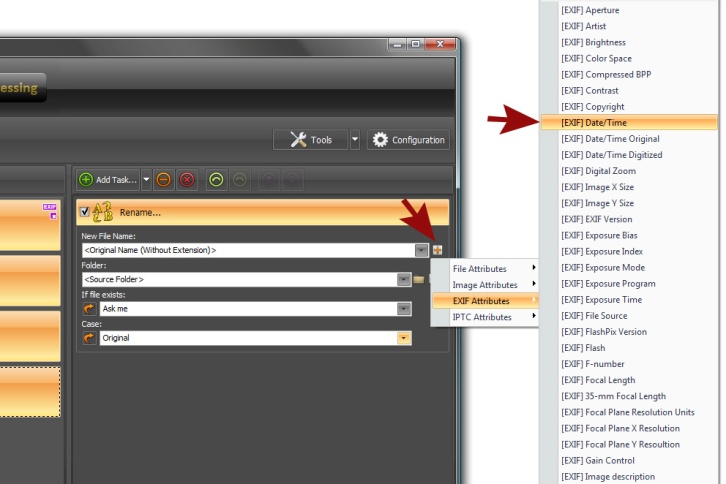
YouŌĆÖll notice that the New File Name field by default is set to, <Original Name (Without Extension)>. ThatŌĆÖs because we have not yet told ImBatch which meta value to reference when it performs the rename task.
- Clicking the
![[+]](/images/imbatch/button_add_attributes.png) button will open the Attributes menu, where youŌĆÖll see various categories to choose from. Each of these categories refers to a different type of image metadata. For this example, weŌĆÖll pick EXIF Attributes followed by [EXIF] Date/Time.
button will open the Attributes menu, where youŌĆÖll see various categories to choose from. Each of these categories refers to a different type of image metadata. For this example, weŌĆÖll pick EXIF Attributes followed by [EXIF] Date/Time.
-
Once youŌĆÖre finished specifying which metadata youŌĆÖd like auto-applied to your file name when the image(s) are saved, you can initiate the task by clicking the
![[>]](/images/imbatch/button_run.png) Run batch image processing button in the top left toolbar.
Run batch image processing button in the top left toolbar.
This way, you can use ImBatch as the bulk photo renamer tool. To discover more fun ImBatch features, browse through our other how-to guides listed here.